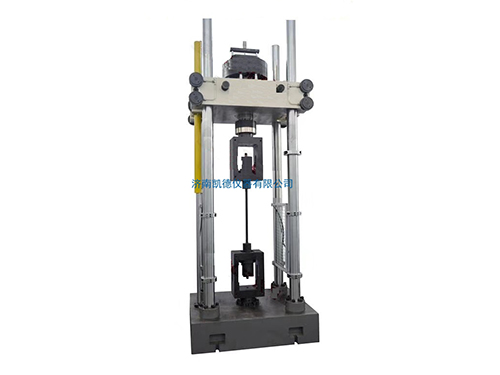
Product category: WAW cylinder under-mounted model — BII model
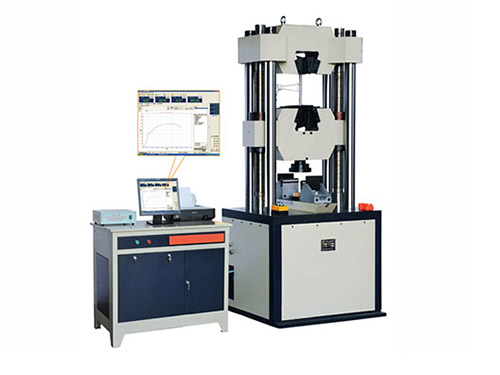
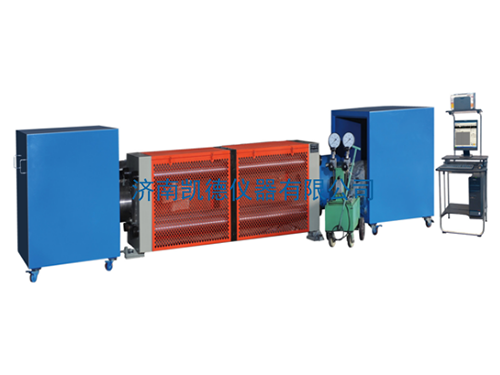
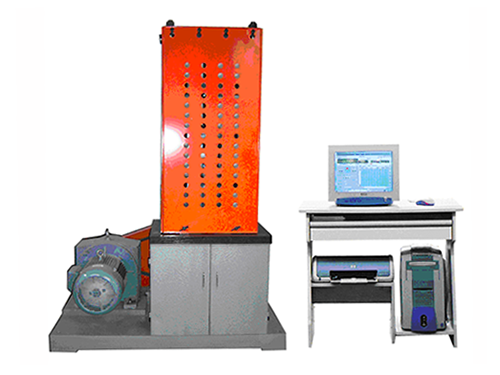
Product name: Microcomputer controlled electro-hydraulic servoUniversal testing machine — WAW-BII series under the cylinder
Product model: WAW-600BII/1000BII(600-1000kN)
Product description :
1. Functions and features:
1. WAW-BII series microcomputer controlled electro-hydraulic servoUniversal testing machine set testtesting machine is mainly used for metal tensile, compression, bending, shear test, adding a simple accessories and equipment, but also on the cement, concrete and other test. It is especially suitable for the tensile test of large specifications (such as large diameter round specimens, large thickness flat specimens, large width flat specimens) or large stroke or large space specimens.
2. The testing machine uses a microcomputer to control a high-precision electro-hydraulic servo valve and drives a precision hydraulic cylinder to realize automatic control of multiple modes such as constant rate test force, constant rate displacement, and constant rate deformation, and complete the stretching and compression of the sample The flexural and flexural test meets the requirements of the national standard GB/T228-2008 "Metallic Material Tensile Test Method at Room Temperature". Adding accessories can complete the test requirements of other various materials.
3. The main machine of the testing machine adopts the hydraulic cylinder under-mounted type: the tensile space is located above the main machine, and the compression and bending test space is located under the main machine between the lower beam and the workbench. Vice drive. The hydraulic cylinder is in the lower part of the testing machine, and the piston is pushed up under the action of hydraulic pressure, which can realize the compression, bending and shear test of the sample; the upper and lower jaw seats are fully open structure, which is convenient to clamp the sample and has good stability. .The structural design is reasonable, simple, stable, reliable, and easy to maintain. The hydraulic servo loading system ensures high precision, high efficiency, low noise, and fast response, and realizes automatic control of loading and reversing of the test.
4. Microcomputer control and processing system:
4.1 Electro-hydraulic servo control system: accurately complete the setting of test parameters during the test process, automatic control of the test process, data acquisition, processing, analysis, storage and display (test data includes: upper and lower yield points, tensile strength, breaking strength, Elastic modulus, elongation at each point, non-proportional elongation, etc.). In addition to the basic closed-loop control of test force, specimen deformation, piston displacement and test progress, and constant velocity stress, constant velocity strain, constant velocity test force, constant velocity displacement, test force retention, and displacement retention control functions, it also With convenient and quick open loop control function.
4.2 Screen display function of test force, peak value, sample deformation, piston displacement, test curve, full keyboard input operation and intelligent setting of control mode expert system, which realizes arbitrary setting of control mode and smooth switching between various control modes. Make the system have the greatest flexibility. The loading and unloading is stable, the program can be controlled during the test, and the "shortcut" operation of the fixed program is also available, and the test speed can be flexibly adjusted by the mouse;
4.3 The test data can be automatically collected and processed according to the requirements of national standards such as GB228-2008 "Metal Tensile Test Method for Room Temperature Materials".(There are a variety of test methods and standards in the data board, which can complete the experiment of a variety of materials) The test process can simulate reproduction and re-analysis of test data, test curve amplification, comparison, and traversal. The test curve can choose the coordinate axis arbitrarily, and can zoom in and out freely;
4.4 Test software based on WindowsXP operating system, amplifier zero adjustment, sensor calibration adopts a combination of reliable hardware support and software support to make the quality more perfect; it can implement sub-authority management for users, and has multiple graphic display windows and unit conversion functions ;
4.5 The test data is managed in a database, and network database communication and management can be carried out;
4.6 The test machine has the ability to expand and update;
5. Protection function:
5.1 Oil cylinder limit protection;
5.2 Hydraulic system overload and overflow protection;
5.3 Test force overload protection;
5.4 Overcurrent and overvoltage protection;
5.5 Safety protection when the sample is broken;
5.6 Automatic protection at the end of the test.
6. The integrated design of oil source, control cabinet and computer desk constitutes a control cabinet, and the oil source, strong electric board and computer host are installed in the control cabinet. On the control counter are monitors and printers. This not only ensures the stability of the hydraulic system, but also has a good overall effect. The humanized appearance design of the control cabinet console is convenient for operation and novel appearance. The integrated oil source control cabinet can be used for electro-hydraulic servos with different tonnages from 600kN to 1000kNUniversal testing machine .
2. Specification parameter table
Serial number |
model |
WAW-600BII |
WAW-1000BII |
1 |
Maximum test kN |
600 |
1000 |
2 |
Test force measurement range |
2%—100%FS |
|
3 |
Test force indication accuracy |
±1% |
|
4 |
Test force resolution kN |
0.01kN |
|
5 |
Displacement measurement resolution mm |
0.01mm |
|
6 |
Deformation measurement resolution mm |
0.01mm |
|
7 |
Maximum stretching space mm (including piston stroke) Can be heightened |
750 |
750 |
8 |
Maximum compression space mm (including piston stroke) Can be heightened |
550 |
|
9 |
Piston stroke mm |
250 |
|
10 |
Maximum moving speed of piston mm/min |
50 |
50 |
11 |
Clamping diameter of round specimen jaws mm |
Φ13-Φ40, Φ40-Φ60 |
Φ13-Φ40, Φ40-Φ60 |
12 |
Flat specimen clamping thickness mm |
0-20, 20-40 |
|
13 |
Clamping width of flat specimen mm |
120 |
|
14 |
Upper and lower plate size mm |
204 ×204 |
|
15 |
Maximum distance between two points of bending test mm |
450 |
|
16 |
Bending roll width mm |
140 |
|
17 |
Bending roll diameter |
Φ40 |
|
18 |
Maximum curvature |
180 |
|
19 |
Cutting sample diameter mm |
Φ10 (optional) |
|
20 |
sensor |
Oil pressure sensor |
|
twenty one |
Display method |
Computer screen displays test force, deformation measurement value, test curve, etc. |
|
twenty two |
Clamping method |
Built-in automatic clamping |
|
twenty three |
Control cabinet size mm |
1000 ×700×1400 |
|
twenty four |
Host size mm |
920 ×760×2600 |
920 ×760×2600 |
25 |
Host weight kg |
4000 |
4000 |
26 |
Host structure |
4 column 2 screw |
|
Note: The parts in red font are special order products.

